

This website uses cookies so that we can provide you with the best user experience possible. Cookie information is stored in your browser and performs functions such as recognising you when you return to our website and helping our team to understand which sections of the website you find most interesting and useful.
Pool Fence Installation
Pool Fences
Pool Safety Fence
Product Summary
Fittings
Gates
Installation
Gallery
Katchakid Pool Fence Installation
Is a Pool Fence Right for You?
Katchakid pool fence installation – when you are your technicians plan out your fence path, you want to make sure it will effectively block all access points to the pool area. You’ll also want to consider access to yard maintenance, pool equipment, play areas for the children and access to grass for pets. A Katchakid representative will be happy to consult with you regarding your choices of pool safety barriers based on the configuration of your pool and yard.
Here’s How it Works
The Katchakid Removable Pool Fence is a concentric tension-based fencing system that uses a series of 15-foot sections of fencing panels. The panels are manufactured from Textilene; a durable polyester woven mesh coated in a marine grade polyvinyl. The fence is anchored into non-conducting, non-corrosive polypropylene sleeves that are core drilled four inches deep into the pool’s decking or other solid surface. We provide deck caps to cover the deck sleeves and give a finished look. The fencing panels are connected at the top of each pole by a 2.5-inch safety latch.
Pool Fence Installation Path – Surrounding the Pool
In most cases, the fence should ideally be positioned a minimum of 24 inches from the water’s edge. This makes it safer for you and your children or guests to walk around safely inside the fence while maintaining the pool, or retrieving a person or object from the pool. Consider not locating your pool fence any closer than 18 inches from the waters edge for safety reasons. Swimmers need space to pull themselves out of the water and to sit on the edge of the pool.
Deck Surface Requirements
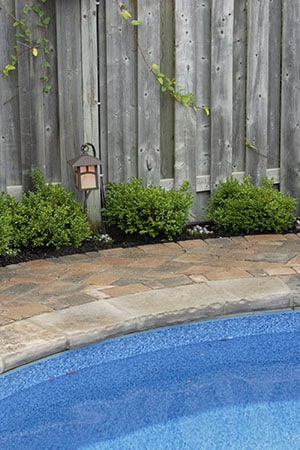
Ideally, the pool fence path should be across a solid surface such as concrete, pave stone, flagstone set in mortar over concrete, or coated concrete decks, preferably level. Remember, the fence is tension-based and must be set into a rigid structure. This surface should be at least four inches thick and six inches wide to facilitate proper tension and installation.
Conforming to Your Pool and Backyard
While we would all like to have our fences go in a straight line, most of the time it’s not the best option. We need to provide bends or gradual turns to conform to the curvature of your pool or deck. A removable pool fence installation should try to avoid tight turns, U-turns, S-turns and 90- degree turns whenever possible, as they may create odd and opposing angles in tension-based fences. Katchakid, Inc. at times uses 45-degree turns for an aesthetically pleasing, safer and stronger tensioned-based fence.
Concrete Footings
Sometimes the path of the removable pool fence traverses across areas where there is only grass or dirt and in these situations concrete footings may be required at every fence post interval. Concrete footings can be placed every three feet or less. Gates should be installed onto firm decking (i.e. concrete, paved stone, etc..)

Using Pool Fencing Along with Existing Structures
When applicable some pools may be partially fenced with a removable pool fence that also uses existing structures such as the property’s perimeter fencing, a wall, a part of the house or another outside structure to complete the barrier surrounding the pool. These structures may be wood, wrought iron, aluminum, stone or masonry and should be at least five feet high and in good condition.
Further Considerations for Routing Your Pool Fence Installation
- Is the surface level? If so, the fence will be safer and will be more aesthetically pleasing to the eye.
- Are there any steps in the pool deck that the pool fence will cross?
- Are there any sprinkler lines, gas lines, electrical lines possibly buried in the path of the fence?
- Will the fence traverse over any large dips in the surface (concrete or dirt) that could allow a child to crawl underneath and access the pool? Some concrete decks have in-deck drains that have drastic slopes in the concrete to the drain.
- Are there any windows, doors, or pet doors that can easily be opened by the child to allow access to the pool area? If so, the fence should follow a path that blocks access.
- Is there a structure too close to the fence path that a child can use to climb the fence? Common structures include: pool furniture, large toys, potted plants, trees, boxes, etc. Use your imagination, because kids certainly will!
- Is there an outdoor cooking, or bar area that is too close to the fence path? Could children use this structure to climb over and have access to the pool? Most cook areas are too short, or difficult to attach a pool fence to due to countertop design, or poor construction materials.
- Have you chosen the safest possible route? For maximum security, consider routing your fence no less than 36 inches from permanent backyard features such as natural rocks and barbecue areas.
Schedule a Free Consultation

I don’t know why, but the meals we have on picnics always taste so much nicer than the ones we have indoors,’ said George.
– Enid Blyton, Five Go Off in a Caravan